window서버에 php7.4.30 설치-(2)
* window서버에 Apache2.4.57 설치
https://gonmossi.tistory.com/115
window서버에 Apache2.4.57 설치
1. Apache 설치 https://www.apachelounge.com/download/ Apache VS17 binaries and modules download www.apachelounge.com 2. 원하는 경로에 압축해제 - 필자는 D:\Apache24 3. 파일 수정 - 수정할 파일 경로 D:\Apache24\conf -> httpd.conf 를
gonmossi.tistory.com
1. php 설치
https://www.filehorse.com/download-php-32/72139/download/
Downloading PHP 7.4.30 (32-bit) from FileHorse.com
To make sure your data and your privacy are safe, we at FileHorse check all software installation files each time a new one is uploaded to our servers or linked to remote server. Based on the checks we perform the software is categorized as follows: Clean
www.filehorse.com
2. 원하는 경로에 압축해제

- 폴더명은 php7으로 변경
- ex) D:\php7
3. 파일 수정

- php.ini-production 파일을 메모장으로 열기

- 759번 째 줄 맨앞에 주석(;)을 지운 뒤 설치 경로 입력 -> extension_dir = "D:/php7/ext"

- 수정 후 파일을 다른 이름으로 저장
- 파일 이름 : php.ini
- 파일 형식 : 모든 파일
- 인코딩 : UTF-8
4. httpd.conf 파일 수정
- D:/Apache24/conf/httpd.conf 해당 경로로 이동 후 파일을 메모장으로 열기

- 285번째 줄 추가 변경 -> DirectoryIndex index.php index.html

- 파일 맨 밑에 추가
| LoadModule php7_module "D:/php7/php7apache2_4.dll" AddType application/x-httpd-php .html .php AddHandler application/x-httpd-php .php |
5. Apache 재실행
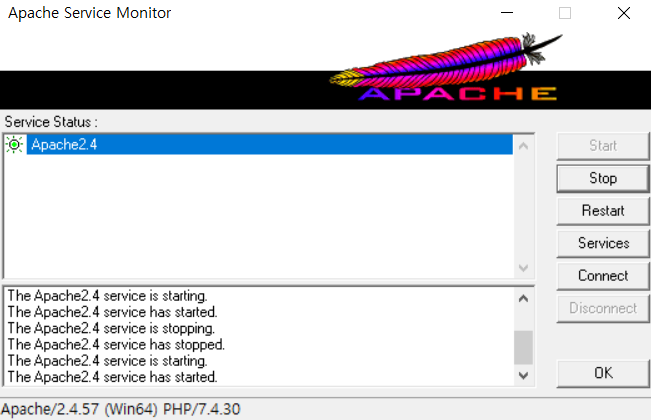
* 둘 중 아무거나 실행
- Stop -> Start
- Restart
6. 파일 생성
- D:\Apache24\htdocs 해당경로로 이동

- phpinfo.php 파일 생성
7. 테스트
- 인터넷 주소창에 http://localhost/phpinfo.php 입력하고 아래와 같이 화면이 뜨면 제대로 작동
